Monille eri arkkitehtuureille! (alpha, arc, arm, arm64, avr32, hppa, ia64, m68k, mipsel, mips64, nios2, ppc, ppc64-32, ppc64le, riscv, riscv64, s390x, sparc, sparc64, superh x86, x86-64 and x32..) Hyvin syvällinen joten sopii pitkän linjan Linux käyttäjille mutta helppo aloitteleville. Tätä on pidetty yllä suurin osin René Rebe:n ja useiden tukijoiden avustuksesta vuodesta 2004 mutta juuret tulee ROCK Linuxin puolelta vieläkin aikaisempaa.
Suosittelen lukemaan dokumentit
Build Intro
Fresh Install 101.
Hyvä aloitus on aloittaa lataamalla "trunk" missä ja millä asennetaan ohjelmat ja päivitykset:
svn co https://svn.exactcode.de/t2/trunk trunk; cd trunk
Ohjelmien eli pakettien asennusta tehdään kääntämällä lähdekoodista T2 SDE:n kautta eli ./t2 install firefox tai jos haluaa esim. tuen ajaa *.appimage tiedostopaketteja tulee asentaa sen tarvittava kirjasto libappimage ja sen riippuvuudet kuten fuse3 ( pitäisi nykyään tulla riippuvuutena valmiina ).. eli ./t2 install libappimage.
Uusi Asennus Reloaded
Tämä on pieni hotfix ehdotus mitkä asentaa ensin kun asentanut järjestelmän (tulee päivittymään).
./t2 install lua
./t2 install -f binutils libtool curl apr apr-util
./t2 install -f perl perl-xml-parser python pip setuptools meson ninja libtool libxml
./t2 install -f glib
./t2 install -f gobject-introspection gdk-pixbuf pango harfbuzz at-spi2-core graphene gtk
Vaihtoehtoisesti kopioitavana yhtenä rivinä kerralla terminaaliin lisärien kanssa:
./t2 install lua; ./t2 inst -f binutils libtool curl apr apr-util; ./t2 inst -f -optional-deps=yes python pip packaging ply pyyaml python-pathspec python-pluggy python-trove-classifiers; ./t2 inst -f meson; ./t2 inst -f pyproject-metadata; ./t2 inst -f meson-python; ./t2 inst perl perl-xml-parser libxml; ./t2 inst -f gobject-introspection perl-gettext shaderc; ./t2 inst -f glu; ./t2 inst -f graphite2; ./t2 inst -f glib; ./t2 inst -f gdk-pixbuf pango harfbuzz at-spi2-core graphene xmlto docbook-xml libxslt; ./t2 inst -f asciidoc docbook2x tcl tk cbindgen; ./t2 inst -f cargo-c; ./t2 inst -f -optional-deps=no gettext epoxy expat libpng freetype findutils grep sed gawk pixman libxcb libx11 libxext libjpeg shared-mime-info cairo libxml libgsf libcroco libxrender wayland-protocols gstreamer tcp_wrappers; ./t2 inst -f gtk xclip xprop
Wifi!
Wpa_supplicant on juuri sinulle! Tässä on esimerkki PlayStation 3 Wifi yhteydelle.
Wifi hotspot skannaus/monitori ohjelma mistä itse pidän (joka toimii suoraan terminaalissa!) on wavemon.
Eka askel on luoda /etc/wpa_supplicant.conf tiedosto jossa on ssid ja salasana konfiguroitu.
Terminaalissa luodaan tarvittavat tiedot Wifi modeemille (ssid on päätelaitteen näkyvä nimi):
wpa_passphrase ssid password >> /etc/wpa_supplicant.conf
Käynnistetään prosessi jos se oli käynnissä tappamalla se ensin näin yhtenä keinona (jos se oli käynnissä).
killall wpa_supplicant
Ja käynnistämällä se oikealla Wifi ajurilla kuten tässä wext (lisää -B parametri jos haluat hiljaisen tausta ajon)
wpa_supplicant -Dwext -iwlan0 -c/etc/wpa_supplicant.conf
Viimeiseksi hankitaan IP wlan0 laitteelle.
dhclient wlan0
Nyt seuraavaksi voit halutessasi tehdä skriptin sysvinit tyyliin tai chrontab -e ajamaan komennot jokaisessa bootissa että se yhdistyy automaattisesti. Mutta se on ihan sinusta kiinni miten haluat kuten vaikka itse ajettavan yhden komennon bash scriptin työpöydälle.
Nvidia ajurit ovat suljetun lähdekoodin omaisuutta joten joutuu asentamaan manuaalisesti nämä ajurit. Lyhyesti joutuu kääntämään Linux Kerneli niin että samalla asentuu Linux Kernelin lähdekoodi mitä ajuri käyttää sitä luomaan nvidian ajurin kerneli moduuli (jolloin moduuli on yhteensopiva Kernelin kanssa).
Kernelin asetuksen voi SDE:stä vaihtaa päälle. Eli ./t2 config ja mene Linux Kernel Options-valikkoon.
Nyt voit kääntää Linux Kernel komennolla ./t2 build linux.
Siirry valmistuksen jälkeen (voit myös bootata uudestaan jos päivitit uudempaan) linux source kansioon cd /usr/src/linux*
Nyt käännetään manuaalisesti tiedostot mitä Nvidia tarvitsee kuten Module.symvers tiedoston ajurin eli kerneli moduulin kääntämiseen.
make prepare
Tässä kohtaa Linux Kernel konfiguroija kysyy mahdollisesti onko Kernelissä STACKPROTECTOR konfigoroitu eli Kyllä/Ei eli Y/n kysymys.
Itse vastaan n eli ei kun omassa eli /boot/kconfig-6.10.8-t2 ei sisällä kyseistä ollenkaan.
Seuraava kysymys on INIT_STACK_NONE option valintoja joista valitse 1.
Aja Kernelin lähteen kääntäminen loppuun seuraavasti:
make modules_prepare
make -j28 (-jx eli monta x cpu säettä haluat käyttää)
make modules -j28
Seuraavaksi laitetaan mustalle listalle entisen mesa:n näyttis ajuri nouveau:n joka seuraavassa bootissa on pois häiritsemästä
Lisää modprobe conf tiedostoon uusi rivi esim. echon avulla:
echo "blacklist nouveau" >> /etc/modprobe.d/modprobe.conf
Lataa Nvidia ajuri.
Tässä esimerkissä käytetään NVIDIA-Linux-x86_64-470.256.02.run ajuria Keplerille joka vaatii patchin käyttöä. Uudemmat ajurit uudemmille näytönohjaimille ei tarvitse välttämättä mitään patchia vaan asennuksen voi käynnistää suoraan *.run tiedostosta.
Ensin ajuri puretaan kansioon jotta se voidaan korjata patch tiedostolla.
NVIDIA-Linux-x86_64-470.256.02.run --extract-only
Luo temp kansio jota käyttää ajurin asennuksessa.
mkdir /root/Downloads/nvidia/tmp
Lataa tämä nvidia.patch tiedosto ja siirrä se kansioon johon ajuri purki itsensä ja suorita korjaus kansiossa.
patch -p0 nvidia.patch
Nyt voit käynnistää ajurin asennuksen.
./nvidia-installer --tmpdir /root/Downloads/nvidia/tmp
Jos ajuri kysyy asennetaanko 32bit kirjastoja ja konfiguroiko X11 serverin sano kyllä.
Käynnistä nyt uudelleen ja kun käynnistät xfce4 eli startxfce4 on nvidia ajossa.
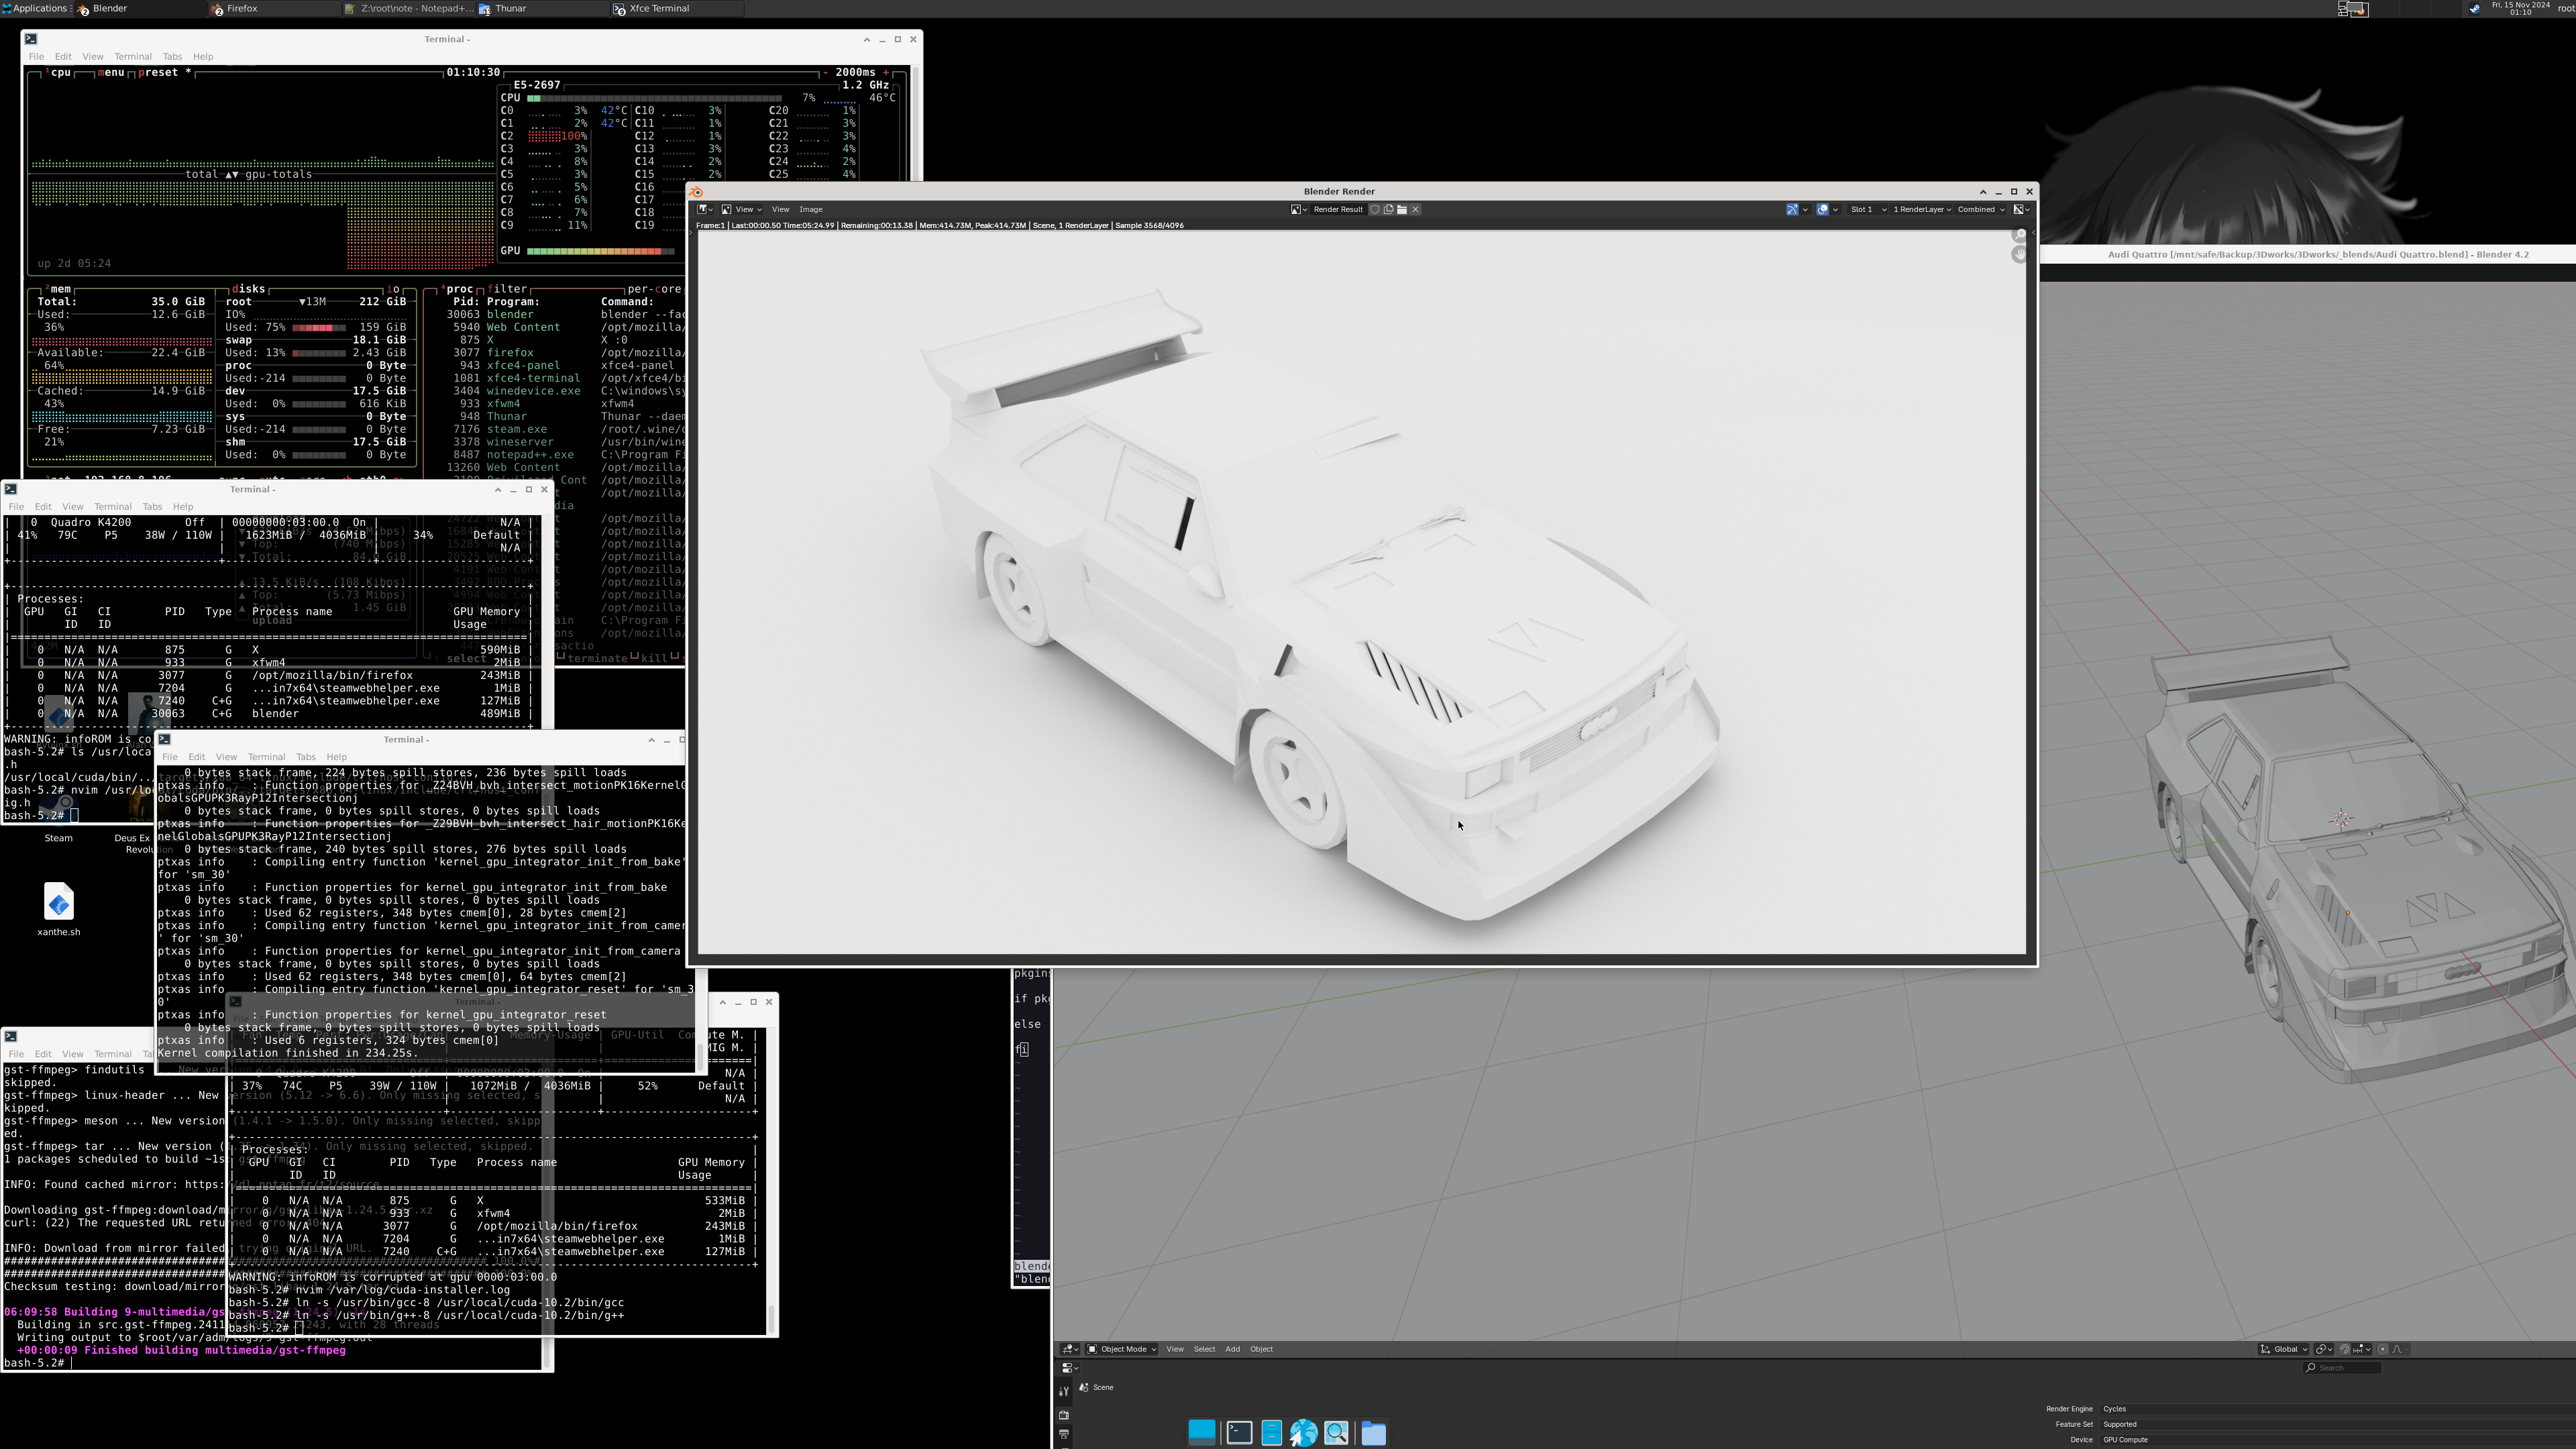
Jos haluat asentaa CUDA tuen (kuten alapuolen kuvassa Blender:in Cycle Render) ja tarvittavan SDK:n nin tarvitse ladata erikseen oikean CUDA toolkit koska Nvidia ei itse osaa kertoa oikeaa. Nvidia osoittaa ajurilla mutta he eivät minun tapauksessa K4200:n kanssa jossa on Compute Capability vain 3.0. Ajurin kautta tulee CUDA jossa on 3.5.
Ainut millä voit selvittää on tämä Wikipedia artikkeli.
Itselle nvidia-smi näyttää ajurien mukana tulleen 11.4 mutta Keplerillä pitää olla CUDA Toolkit 10.2.
Nvidia tarjoaa useampaa Distribution vaihtoehtoa joista T2 Linuxin kanssa toimii esim. Fedoran alle merkitty *.run tiedosto.
Lataa kyseinen tiedosto ja aja se (luo tmp kansio ensin haluaamasi paikkaan)
./cuda_10.2.89_440.33.01_linux.run --tmpdir /root/Downloads/nvidia/tmp --override --silent --toolkit
Tämä CUDA version NVIDIA CUDA Compiler Driver NVCC tarvitsee GCC 8x version kääntäjän avukseen koska käyttää vanhentuneita math kirjastoja mitä ei enään uudemmista GCC versioista löydy ja yleensä kun ekaa kertaa ajaa ohjelman CUDAa se kääntää ohjelman CUDA kääntäjän GCC:n avulla.
GCC-8:n paketin asennettuaan joudut linkittämään sen CUDA:n /bin kansioon jotta CUDA löytää ja käyttää sitä.
ln -s /usr/bin/gcc-8 /usr/local/cuda-10.2/bin/gcc
ln -s /usr/bin/g++-8 /usr/local/cuda-10.2/bin/g++
..Valmista!
DirectX9,10,11 jne pelit toimii parhaiten Vulkan rajapinnalla OpenGL rajapinnan sijaan uudemmalla kääntäjällä Linuxilla.
T2 Linuxilla tämä on hyvin helppoa ilman että viritelee vanhoja Wine versioita Lutris tai Proton ja Protonista eri versioista tehdyillä virityksillä.
Jos katsot Protonin lähdekoodia Githubista mistä se koostuu niin ymmärrät mitä tarkoitan.
Nvidia ajurin jälkeen voit asentaa vastaavan hyödyn suoraan Winetricks avulla Vulkan tuen (ja itse Wine:n).
./t2 install wine winetricks gst-ffmpeg
Suoraan Winetricksillä voi asentaa dxvk joista itse tarvitsen vanhalla Kepler näyttiksellä vanhemman version koska Vulkan rajapinnan tuki Keplerillä on alle 1.3.
winetricks dxvk1103 (Kepler GPU)
winetricks dxvk (tai uudemmat)
winetricks vk3d
Kysyit varmaan miksi gst-ffmpeg?
Kyseinen paketti on tarvittu esim Fallout 4 jossa muuten ei ole menu:ssa ääniä ja ei dialog ääniä. Tähän ei tarvita xact eli Xaudio2.7 dll virityksiä joten parempi ratkaisu. Itse käytän Wine:n kautta Steamiä joka vaatii winetricks corefonts asennettuna jotta näet tekstit. Miksen Valven Linux käännöstä? Se perustuu jostain syystä Ubuntu 12 versioon.. Vuodelta 2012!
Steam vaatii seuraavan:
wine '/root/.wine/drive_c/Program Files (x86)/Steam/steam.exe' -no-dwrite
EPIC Games: wine '/root/.wine/drive_c/Program Files (x86)/Epic Games/Launcher/Engine/Binaries/Win32/EpicGamesLauncher.exe' -skipbuildpatchprereq -opengl -http=wininet
Cyberpunk 2077 lähtee käyntiin muunmuassa: env VKD3D_C VK_ICD_FILENAMES=/etc/vulkan/icd.d/nvidia_icd.json "WINEPREFIX=/root/.wine" wine 'Path/to/Cyberpunk 2077/bin/x64/Cyberpunk2077.exe'
Äänet saa helposti alsamixerin avulla ulos luomalla/muokkaamalla tiedostoa /etc/asound.conf ja lisäämällä sinne seuraavat:
defaults.pcm.card x
defaults.pcm.device y
defaults.ctl.card x
Tiedot eli numerot näihin saat komennolla aplay-l josta itselle tulee esimerkiksi:
card 1: NVidia [HDA NVidia], device 3: HDMI 0 [L32p-30]
Missä haluttu ulostulolähde näkyykin x = 1 ja y = 3.
Käynnistä ohjelma uudestaan mistä yritit toistaa ja sinulla pitäisi nyt olla ääni. Jos ei niin vilkaise alsamixer jos PCM ulostulo mykistettynä yhä.
Tässä päivitetympi vaihtoehto kun sdl2 voi valittaa bufferi varoituksia joten tässä käytetään dmixiä avuksi.
pcm.!default {
    type plug
    slave.pcm "dmixer"
}

pcm.dmixer {
    type dmix
    ipc_key 1024
    slave {
        pcm "hw:1,3"
        period_time 0
        period_size 1024
        buffer_size 4096
        rate 48000
    }
}

ctl.!default {
    type hw
    card 1
}
Lisää päivitystä! Tässä on miten saada äänet välitettyä vrituaaliseen mikrofooniin työpöytä striimamiseen tai nauhoitukseen (kaikki mitkä sinä kuulet) snd_aloop kernel moduliin kanssa. Lataa moduuli esim. väliaikaisesti modprobe snd_aloop pcm_substreams=2 (ei kuulu muuten äänet).
Firefox jotta löytää Mikrofoonin joutuu käynnistämään terminaalista env APULSE_CAPTURE_DEVICE=loopout_mixed apulse firefox (Tarvitset apulse ohjelman olevan asennettuna).
Virtuaali web kameran voi myös luoda asennettavan v4l2loopback lisämoduulin ja ffmpeg:n avulla.
Esimerkki videomoduulin käynnistämiselle: modprobe v4l2loopback devices=1 video_nr=10 card_label="FFmpegCam" exclusive_caps=1 max_buffers=2
Esimerkki ffmpeg striimaus nauhoituksesta (4K 720p muunnoksella): ffmpeg -f x11grab -framerate 24 -video_size 3840x2160 -i :0.0+0,0 -vf scale=1280:720,format=yuv420p -c:v rawvideo -f v4l2 /dev/video10
pcm.multi {
hint.description "The Damned Mixer"
    type route;
    slave.pcm {
        type multi;
        slaves.a.pcm "dmixer";
        slaves.b.pcm "loop";
        slaves.a.channels 2;
        slaves.b.channels 2;
        bindings.0.slave a;
        bindings.0.channel 0;
        bindings.1.slave a;
        bindings.1.channel 1;
        bindings.2.slave b;
        bindings.2.channel 0;
        bindings.3.slave b;
        bindings.3.channel 1;
    }

    ttable.0.0 1;
    ttable.1.1 1;
    ttable.0.2 1;
    ttable.1.3 1;
}


pcm.!default {
    type plug
    slave.pcm "multi"
}

pcm.dmixer {
    type dmix
    ipc_key 1024
    slave {
        pcm "hw:1,3"
        period_time 0
        period_size 1024
        buffer_size 4096
        rate 48000
    }
}

ctl.!default {
    type hw
    card 1
}


pcm.loopout {
	type plug
	slave.pcm "hw:2,0"
}


pcm.loop {
    type dmix
    ipc_key 1024
    slave {
        pcm "hw:Loopback,1,1"
        period_time 0
        period_size 1024
        buffer_size 4096
        rate 48000
    }
}


pcm.loopout_mixed {
    type dsnoop
    ipc_key 2048
    slave {
        pcm "hw:Loopback,0,1"
        format S16_LE
        rate 48000
        channels 2
    }
}

}
Tämä uudehko formaatti on hyvin monipuolinen ja tehokas formaatti. Itsellä oli aloitus vaikeuksia useiden monit2sde.org
For many various architectures! (alpha, arc, arm, arm64, avr32, hppa, ia64, m68k, mipsel, mips64, nios2, ppc, ppc64-32, ppc64le, riscv, riscv64, s390x, sparc, sparc64, superh x86, x86-64 and x32..) Very deep DIY spirit for harder Linux users but easy to use for starters in same package! This has been kept up by very big part by René Rebe and by many contributors over the years since 2004 which roots comes from ROCK Linux which is even way earlier.
I recommend reading some of usage from documentation page
Build Intro
Fresh Install 101
Good start is do have trunk downloaded where we apply patches and do compilation etc.:
svn co https://svn.exactcode.de/t2/trunk trunk; cd trunk
Software (or packages) install is done by compiling them from source code with T2 SDE as example: ./t2 install firefox or to add support of *.appimage you need install its library libappimage and its dependencies fuse3 ( this should come as dep these days automatically ).. so as ./t2 install libappimage.
Fresh Install Reloaded
This is more just own hotfix suggestion which to install after fresh system install (this will be updating).
./t2 install lua
./t2 install -f binutils libtool curl apr apr-util
./t2 install -f perl perl-xml-parser python pip setuptools meson ninja libtool libxml
./t2 install -f glib
./t2 install -f gobject-introspection gdk-pixbuf pango harfbuzz at-spi2-core graphene gtk
Alternative.. with all in one with some extras:
./t2 install lua; ./t2 inst -f binutils libtool curl apr apr-util; ./t2 inst -f -optional-deps=yes python pip packaging ply pyyaml python-pathspec python-pluggy python-trove-classifiers; ./t2 inst -f meson; ./t2 inst -f pyproject-metadata; ./t2 inst -f meson-python; ./t2 inst perl perl-xml-parser libxml; ./t2 inst -f gobject-introspection perl-gettext shaderc; ./t2 inst -f glu; ./t2 inst -f graphite2; ./t2 inst -f glib; ./t2 inst -f gdk-pixbuf pango harfbuzz at-spi2-core graphene xmlto docbook-xml libxslt; ./t2 inst -f asciidoc docbook2x tcl tk cbindgen; ./t2 inst -f cargo-c; ./t2 inst -f -optional-deps=no gettext epoxy expat libpng freetype findutils grep sed gawk pixman libxcb libx11 libxext libjpeg shared-mime-info cairo libxml libgsf libcroco libxrender wayland-protocols gstreamer tcp_wrappers; ./t2 inst -f gtk xclip xprop
I Want Wifi!
There is wpa_supplicant for you! Here is example for PlayStation 3 Wifi connection.
One Wifi hotspot scan/monitoring software i highly like (and runs in terminal!) is wavemon.
First step is to have /etc/wpa_supplicant.conf file with ssid and password configured.
So in terminal generate in conf file the required information of your router:
wpa_passphrase ssid password >> /etc/wpa_supplicant.conf
Next rebooting service by first killing the service.
killall wpa_supplicant
And starting the service with Wifi driver wext (add -B parameter if want silent run in background)
wpa_supplicant -Dwext -iwlan0 -c/etc/wpa_supplicant.conf
And finally get IP from router.
dhclient wlan0
Now as next you can example make script in boot to do starting automatically by sysvinit or chrontab -e. Its all up to you.
Footnote - Personal plead to America:
Source* "..Senior SpaceX officials reached a conclusion: The Pentagon should be paying more for access to their satellite Wi-Fi network."
Wifi ≠ Internet. Or i will soon start Bluetooth satellite networks. PLEASE.
Nvidia Driver ( Kepler included )
Nvidia drivers are closed source licensed so you need to do some manual work. In shortened you need recompile Linux kernel to have Kernel Sources which Nvidia driver uses to compile its own Kernel module for your Kernel.
This Kernel setting option can be turned from SDE as by doing this ./t2 config and go to Linux Kernel Options-submenu.
Now you can recompile Linux Kernel by the command ./t2 inst -f linux.
Move to (or you reboot now and start using new Kernel if it was newer/older) linux source directory cd /usr/src/linux*
As a next need manually compile from left source files what Nvidia needs like as Module.symvers to compile its Kernel Module Driver.
make prepare
This moment the Linux Kernel Configuration asks does the Kernel include STACKPROTECTOR so Yes/No question.
I answer n as No because i dont have such thing at /boot/kconfig-6.10.8-t2.
Next question was INIT_STACK_NONE options which i chose such one so number 1.
Now continue to finish by running next commands:
make modules_prepare
make -j28 (-j accounts with x number how many cores/threads of cpu you give work)
make modules -j28
This moment you can add your old Mesa driver nouveau in blacklist so in next boot it wont be active.
Add in modprobe conf file new line with echo example:
echo "blacklist nouveau" >> /etc/modprobe.d/modprobe.conf
Download Nvidia driver.
In this example we use NVIDIA-Linux-x86_64-470.256.02.run driver for Kepler GPU which requires patching and GCC-8 (download t2 pkg diff from bottom and use CC variable to point to it while driver install). Newer GPUs and drivers might not need patching so you can install more directly them and they work later GCC versions. Please refer nvidia readmes of the support of these as new versions keeps coming and things do change.
First we extract the driver so we can patch it.
NVIDIA-Linux-x86_64-470.256.02.run --extract-only
Create temp directory which driver will use while building/install.
mkdir /root/Downloads/nvidia/tmp
Download this nvidia.patch file and move it directory where the driver did extract to and run the patching inside the directory.
patch -p0 nvidia.patch
Now all is ready to start the driver installation.
./nvidia-installer --tmpdir /root/Downloads/nvidia/tmp
If the driver asks to install 32bit support library and to Configure X11 server, answer yes.
Reboot now and when you start the x enviroment like xfce4 with startxfce4 Nvidia driver is now active. Notice that newer drivers for newer Kernels or newer GPUs might not need patching.
CUDA Toolkit
If you want install CUDA support (Like going with Blender Cycle Render at below picture) with the SDK then you need separately right CUDA toolkit as Nvidia is total arse how they list Driver and CUDA level support like in my case totally wrong one with K4200 GPU which Compute Capability is only 3.0. And driver comes with CUDA which has 3.5.
ONLY reasonable quick way figure out yours is this Wikipedia artikle.
For 470 nvidia-smi comes and shows 11.4 but for me should be CUDA Toolkit 10.2.
Nvidia offers multiple Distribution options which with T2 Linux works example marked under Fedora *.run file.
Download that run file and run it as (create first tmp directory, modify path if elsewhere)
./cuda_10.2.89_440.33.01_linux.run --tmpdir /root/Downloads/nvidia/tmp --override --silent --toolkit
NOTE! This CUDA versio's NVIDIA CUDA Compiler Driver NVCC supports up to GCC 8x compiler only because uses deprecated math libraries which not anymore found in newer GCC versions which the Nvidia compiler uses at first time running programs CUDA layer which it compiles with that GCC compiler through Nvidia CUDA compiler.
After installing GCC-8 you need link it to CUDA /bin directory so CUDA uses it correctly.
ln -s /usr/bin/gcc-8 /usr/local/cuda-10.2/bin/gcc
ln -s /usr/bin/g++-8 /usr/local/cuda-10.2/bin/g++
..Finished!
Games! Wine + DXVK + vk3d ("Proton")
DirectX9,10,11 and so the games works these days faster with Vulkan layer instead of OpenGL on Linux which is very clear in performance.
On T2 Linux this is easy and no.. no need start using multiple versions of Wine, Proton, Lutris or their versions etc.
If you look ex. source code of Proton from Github you get the idea and point what i mean. Yay!
Now after Nvidia driver you can install similar benefits directly through simpler and old school Winetricks the Vulkan layer for the Wine.
./t2 install wine winetricks gst-ffmpeg
After installing it all you can use Winetricks itself to install dxvk which i had use older version with Kepler GPU as the Vulkan support is below 1.3.
winetricks dxvk1103 (Kepler GPU)
winetricks dxvk (or newer GPU's)
winetricks vk3d
You noticed gst-ffmpeg?
The package is required on ex. Fallout 4 which without it you dont get sound in menu nor hear voice dialog. And yes no more dll overrides for xact aka Xaudio2.7 as Wine can handle it straight these days. I personally use Steam via Wine which requires additionally winetricks corefonts to show the font in UI. Why not the famous Valve Steam Linux version? It is based on old Ubuntu 12.. from year 2012! Not gonna fix that myself.
Steam requires:
wine '/root/.wine/drive_c/Program Files (x86)/Steam/steam.exe' -no-dwrite
EPIC Games: wine '/root/.wine/drive_c/Program Files (x86)/Epic Games/Launcher/Engine/Binaries/Win32/EpicGamesLauncher.exe' -skipbuildpatchprereq -opengl -http=wininet
Cyberpunk 2077 starts by example: env VKD3D_C VK_ICD_FILENAMES=/etc/vulkan/icd.d/nvidia_icd.json "WINEPREFIX=/root/.wine" wine 'Path/to/Cyberpunk 2077/bin/x64/Cyberpunk2077.exe'
DisplayPort and Sound
Sounds can be get easy through alsamixer by creating or editing the file from /etc/asound.conf and adding there next lines:
defaults.pcm.card x
defaults.pcm.device y
defaults.ctl.card x aplay-l which from example for me i get:
card 1: NVidia [HDA NVidia], device 3: HDMI 0 [L32p-30]
Where wanted audio source is shown so i need replace x and y to numbers of x = 1 and y = 3.
Reopen the program where you tried get sound out and now you should have sound. If no sound check from alsamixer and check that GPU PCM output is not muted.
Here is slightly updated example for sdl2 which might whine of buffer warnings so here we use dmix.
pcm.!default {
    type plug
    slave.pcm "dmixer"
}
pcm.dmixer {
    type dmix
    ipc_key 1024
    slave {
        pcm "hw:1,3"
        period_time 0
        period_size 1024
        buffer_size 4096
        rate 48000
    }
}
ctl.!default {
    type hw
    card 1
}Bonus!
Here is with additions for desktop streaming or to record all desktop sounds (from all applications at same time) with snd_aloop kernel module loopback output as as virtual microphone.
The module you can load temporarily with
modprobe snd_aloop pcm_substreams=2 (need load or you wont hear sound either).
You can make then firefox example detect this as microphone with Microsoft Teams (or your favorite corporate software) by launching firefox with env APULSE_CAPTURE_DEVICE=loopout_mixed apulse firefox from terminal (Note: You need apulse to be installed).
You can then make too virtual webcam with v4l2loopback installable module (at bottom of page while patch getting applied) and ffmpeg.
Example for video loading module: modprobe v4l2loopback devices=1 video_nr=10 card_label="FFmpegCam" exclusive_caps=1 max_buffers=2
Example to make ffmpeg streaming capture (with downscaling 4K to 720p):
ffmpeg -f x11grab -framerate 24 -video_size 3840x2160 -i :0.0+0,0 -vf scale=1280:720,format=yuv420p -c:v rawvideo -f v4l2 /dev/video10
 pcm.multi {
hint.description "The Damned Mixer"
    type route;
    slave.pcm {
        type multi;
        slaves.a.pcm "dmixer";
        slaves.b.pcm "loop";
        slaves.a.channels 2;
        slaves.b.channels 2;
        bindings.0.slave a;
        bindings.0.channel 0;
        bindings.1.slave a;
        bindings.1.channel 1;
        bindings.2.slave b;
        bindings.2.channel 0;
        bindings.3.slave b;
        bindings.3.channel 1;
    }
    ttable.0.0 1;
    ttable.1.1 1;
    ttable.0.2 1;
    ttable.1.3 1;
}
pcm.!default {
    type plug
    slave.pcm "multi"
}
pcm.dmixer {
    type dmix
    ipc_key 1024
    slave {
        pcm "hw:1,3"
        period_time 0
        period_size 1024
        buffer_size 4096
        rate 48000
    }
}
ctl.!default {
    type hw
    card 1
}
pcm.loopout {
	type plug
	slave.pcm "hw:2,0"
}
pcm.loop {
    type dmix
    ipc_key 1024
    slave {
        pcm "hw:Loopback,1,1"
        period_time 0
        period_size 1024
        buffer_size 4096
        rate 48000
    }
}

pcm.loopout_mixed {
    type dsnoop
    ipc_key 2048
    slave {
        pcm "hw:Loopback,0,1"
        format S16_LE
        rate 48000
        channels 2
    }
}
BTRFS format
This new-ish storage format is very multipurpose and powerful one if you know how to use it. For me i had struggle due many outdated guides on internet which had lot different configurations and the BTRFS itself might even been misconfigured on their Distros! The idea is in usage of subvolumes which can beused for snapshot backups like from whole system and best part is this backup copy wont fill unnecessary your storage as it only takes account modified files. So its very efficient and quick! NOTE if boot section is on same partition you need to use different way boot backup of that which i am not going through in this little tip guide due i show just what btrfs is after Grub boot.
After T2 Linux install you have main volume which ID is 5.
Create directory where to save snapshots of the system /
mkdir /snapshots
btrfs subvol snapshot / /snapshots/BACK00
Check now this new backup and its identifier ID number
btrfs subvol list /
You will see there ex. now: ID 256 gen 149084 top level 5 path snapshots/BACK00
You can check your current system ID with btrfs subvol get-default / which is 5 by default.
You can in theorical level change your current running systems wallpaper to see a change in next boot to confirm btrfs functionality.
To be able then boot into snapshot like here into snapshot which ID is 256.
btrfs subvol set-default 256 /
Reboot now and you should see now again old wallpaper and you can use this snapshot normally or to test things inside snapshot and then return to original system in same way too if you wish so by btrfs subvol set-default 5 / and reboot.
Unofficial Packages
I list here Unofficial packages which mostly wont come to T2SDE package management due niche use. And some package or their patches which not in T2SDE yet. Copy to trunk directory and run there patch -p0 -i file.diff
GCC-8.diff
GCC-11.diff
GCC-13.diff
fftw3.diff [for Blender]
llvm.diff [for Blender and else]
qt5.diff [Last Qt5 pkgs version which works with nvidia drivers, remove similar packages from qt directory. Notice that Qt5 and Qt6 cannot be installed at same time]
v4l2loopback.diff
nv-codec-headers.diff [headers required to interface with Nvidias codec APIs]
ffmpeg.diff [with cuda support]
ccid.diff [Fixed ccid package which has obsolete code so can use smart code readers with pcsc-lite]
noto-cjk.diff [Japanese and Korean characters visible with font install]
thunderbird.diff [Fixes possible thunderbird crash issue when using email providers with calendar funcitonality ex. outlook. Bug makes Settings not working in locale area and you can send only one email and then whole thunderbird frozes from moving emails to Sent directory or loading any new messages. This bug is existed since 105? thunderbird version and still continues existing in latest thunderbird versions up to this day. This hotfix prevents icu4c not providing any nonsense]
/
mkdir /snapshots
btrfs subvol snapshot / /snapshots/BACK00
Voit nyt tarkistaa kopion tunniste ID:n.
btrfs subvol list /
Tuloksena näkyy esim.: ID 256 gen 149084 top level 5 path snapshots/BACK00
Voit tarkistaa järjestelmän tämän hetkisen ID eli tunnisteen btrfs subvol get-default / joka on yleensä vakiona 5 .
Testi mielessä voit nyt vaihtaa taustakuvan kun testataan palauttamista ja varmistetaan btrfs toiminta.
Vaihdetaan aliosion aktiivinen ID joka oli 5 snapshot ID:hen joka oli 256.
btrfs subvol set-default 256 /
Käynnistä nyt uudelleen ja sinulla on taas edellinen taustakuva näkyvissä ja voit käyttää järjestelmää ihan normaalisti tai kokeilla eriasioita ja sitten palata alkuperäiseen järjestelmään eli btrfs subvol set-default 5 / ja käynnistää uudelleen.. ja poistaa tämä snapshot btrfs subvol delete /snapshots/BACK00.
<dt style="margin-top: 6em; padding-left: 1em;">Henkilökortti</dt>
Sen että pääset käyttämään vaikka Prisman Trust lukijaa henkilökortin kanssa joudut asentamaan ajurit ja ohjelman ./t2 inst pcsc-lite ccid *huom varmista että käytät viimeisintä korjausta alhaalta ccid:n osalta.
Aktivoi pcsd käynnistymään koneen käynnistyessä stone konfiguraatiossa valitse Runlevel Configuration (services) ja varmista listalta pcscd on valittu kaikki 3:sta ylöspäin. Huom. Jos ongelmia jos polkit paketti asennettuna niin muuta käynnistys komentoa vi /etc/init.d/pcscd niin ettei käytä polkit ominaisuutta /usr/sbin/pcscd --disable-polkit.
Voit käynnistää nyt pcscd ajamalla /etc/init.d/pcscd start.
Tarvitaan väliohjelma vielä esim. firefoxiin ja kun kortti käyttää PIN koodia certificaation kanssa ja tällä hetkellä Atostek ID on Digi- ja Väestötietoviraston valinta.
Voit ladata sen täältä (*.rpm on yhteensopiva) dvv.fi.
Asennustiedoston voi purkaa File rollerin kautta tai rpm package managerin kautta jolloin jää usr kansio minkä voit kopioida järjestelmän juureen ( / ) milloin tiedostot siirtyy oikeille paikoille.
Firefoxissa mene about:preferences#privacy josta löydät "Turvalaitteet" tai "Security Devices..." kohdan josta avautuu Device Manager mistä taas painat Lataa / Load ja painat Etsi/Browse... Tiedostonhallinnalla mene /usr/lib64 ja valitset sieltä "Atostek-ID-PKCS11.so" tiedoston ja kaikki valmista käyttöön!
Huomaa että dvv.fi:n sivusto kortin testaukseen ei toimi joten älä tuhlaa aikaa sen kanssa testaukseen.
T2 jakelu ulkopuolisesti ohjelmia tai eri versioita. Ja joitain pakettien korjaus patcheja mitä ei vielä kierrossa. Ladatussa svn trunk aja komento: patch -p0 -i file
GCC-8.diff
GCC-11.diff
GCC-13.diff
fftw3.diff [for Blender]
llvm.diff [for Blender and else]
qt5.diff [Last Qt5 pkgs version which works with nvidia drivers, remove similar packages from qt directory. Notice that Qt5 and Qt6 cannot be installed at same time]
v4l2loopback.diff
nv-codec-headers.diff [headers required to interface with Nvidias codec APIs]
ffmpeg.diff [with cuda support]
ccid.diff [Korjaa ccid paketin jossa on hylättyä koodia jolloin voi käyttää älykortin lukijaa esim. pcsc-lite kanssa]
noto-cjk.diff [Japani ja Korea esim. näkyviin fontin asennuksella]
thunderbird.diff [Thunderbird bugi milloin icu4c antama tieto locale tieto aiheuttaa domino efektin jos käyttää sähköpostia kuten Outlook missä on kalenteri voit lähettää yhden viestin jonka jälkeen ei viestit lataudu ja viestin lähetyksessä lähetetyn viestin siirto Lähetetyt kansioon epäonnistuu. Tämä korjaus varmistaa ettei virheellistä dataa pääse väärän paikkaan aiheuttamaan ongelmia. ]